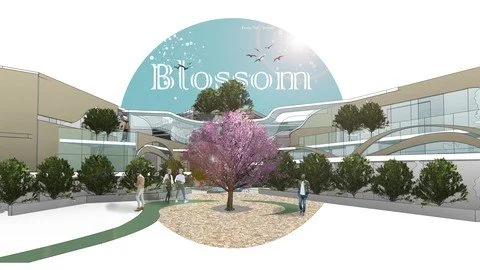
Rendering A 3D Architectural Drawing Using Adobe Photoshop
Create amazing renders using Photoshop from a boring line drawing!

What you'll learn
Photoshop
Architectural Rendering
Requirements
Photoshop installed on a capable laptop
Description
This class aims to form an understanding of the way Photoshop operates, while focusing on aspects most relevant to architects and architectural students.
This understanding will be made by producing a render for a 3D image using Photoshop, transforming it from a single line drawing to a full-fledged 3D render that you can use for your posters and architectural visualisation.
You do not need any prior experience with Photoshop; however, you will need a working version of Photoshop on your laptop.
In this class, you will learn (for both Windows and MacOS):All the relevant Photoshop tools for an architecture student/architect.
The main elements of Photoshop and how to operate it using shortcuts.
Adding materials through colouring, or importing textures Adding and manipulating images to add more elements.
Adding figures and people in three styles – realistic (from scratch), silhouettes, and cartoonish.
Applying final touches to post-process the render.
If that sounds like fun to you, please join me to spend an hour in learning this software that you will be using on a daily basis.
You will transform this boring line drawing into something magical using Photoshop.
You can follow the steps shown in the class or you can show me your own creative creations by going off-course to create something your own way using the tools and techniques you learnt.
I cannot wait to see what you come up with.
However, if you are feeling too creative for your own skills, please feel free to get in touch and we will figure it out together!
Overview
Section 1: Introduction
Lecture 1 Introduction
Section 2: Everything you'll need
Lecture 2 System requirements
Lecture 3 Files needed
Section 3: Colouring and Materials
Lecture 4 Getting started with Photoshop
Lecture 5 Colouring and Materials using different tools
Lecture 6 Glass
Lecture 7 Seamless materials
Section 4: Touch ups
Lecture 8 Adding trees
Lecture 9 Adding figures
Lecture 10 Final touch ups
Section 5: Wrap up
Lecture 11 Be proud!
Architecture students
Last updated 8/2022
MP4 | Video: h264, 1280x720 | Audio: AAC, 44.1 KHz
Language: English | Size: 929 MB | Duration: 1h 38m
Download
http://s19.alxa.net/one/2023/11/Ren....Photoshop.rar
Create amazing renders using Photoshop from a boring line drawing!

What you'll learn
Photoshop
Architectural Rendering
Requirements
Photoshop installed on a capable laptop
Description
This class aims to form an understanding of the way Photoshop operates, while focusing on aspects most relevant to architects and architectural students.
This understanding will be made by producing a render for a 3D image using Photoshop, transforming it from a single line drawing to a full-fledged 3D render that you can use for your posters and architectural visualisation.
You do not need any prior experience with Photoshop; however, you will need a working version of Photoshop on your laptop.
In this class, you will learn (for both Windows and MacOS):All the relevant Photoshop tools for an architecture student/architect.
The main elements of Photoshop and how to operate it using shortcuts.
Adding materials through colouring, or importing textures Adding and manipulating images to add more elements.
Adding figures and people in three styles – realistic (from scratch), silhouettes, and cartoonish.
Applying final touches to post-process the render.
If that sounds like fun to you, please join me to spend an hour in learning this software that you will be using on a daily basis.
You will transform this boring line drawing into something magical using Photoshop.
You can follow the steps shown in the class or you can show me your own creative creations by going off-course to create something your own way using the tools and techniques you learnt.
I cannot wait to see what you come up with.
However, if you are feeling too creative for your own skills, please feel free to get in touch and we will figure it out together!
Overview
Section 1: Introduction
Lecture 1 Introduction
Section 2: Everything you'll need
Lecture 2 System requirements
Lecture 3 Files needed
Section 3: Colouring and Materials
Lecture 4 Getting started with Photoshop
Lecture 5 Colouring and Materials using different tools
Lecture 6 Glass
Lecture 7 Seamless materials
Section 4: Touch ups
Lecture 8 Adding trees
Lecture 9 Adding figures
Lecture 10 Final touch ups
Section 5: Wrap up
Lecture 11 Be proud!
Architecture students
Last updated 8/2022
MP4 | Video: h264, 1280x720 | Audio: AAC, 44.1 KHz
Language: English | Size: 929 MB | Duration: 1h 38m
Download
http://s19.alxa.net/one/2023/11/Ren....Photoshop.rar