Generating Architectural Visualization Concepts in Rhino
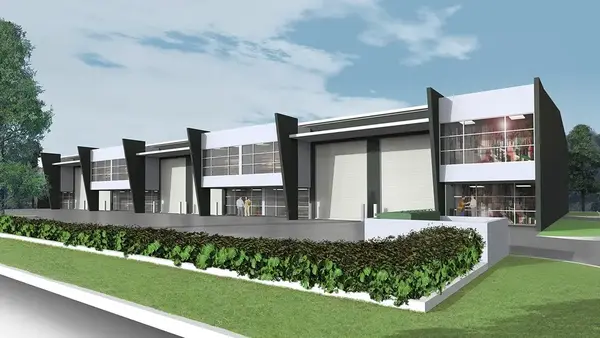
Throughout these lessons we'll demonstrate a basic architectural visualization workflow to convert 2D plans into a 3D model using Rhino 5. We'll then produce effective rendered images using the Flamingo nXt rendering plug-in and post render our work using Photoshop CS6.
01. Introduction and project overview
02. Importing background bitmaps
03. Building the underlying construction lines
04. Modeling the building walls and roof
05. Creating the warehouse roof elements
06. Building the office structure
07. Generating internal walls, glazing, and awnings
08. Fabricating our window framing
09. Finalizing our windows
10. Adding in the roller shutters
11. Creating floor slabs
12. Modeling the site
13. Finalizing the site modeling
14. Selecting camera views
15. Establishing external lighting
16. Allocating materials using Rhino 5
17. Assigning materials using Flamingo nXt
18. Adjusting our texture maps
19. Using decals in Flamingo nXt
20. Adjusting our render settings
21. Post-rendering in Photoshop CS6
22. Creating foreground texture
23. Adding additional details and reflections
24. Finalizing our architectural visualization
File Size: 2.05 GB
Download
http://s9.alxa.net/one/2025/02/Gener...s.in.Rhino.rar